How to draw a surface ROI?
1. Open connectome workbench interface
To open the connectome workbench interface:
- open a new terminal
- type wb_view
- press enter
2. Load a surface file and a layer
To load a surface file:
- Click File > Open File…
- Nevigate to the directory where the templates are stored (for example: /cifs/diedrichsen/data/Atlas_templates/fs_LR_32)
- Choose a surface file, and click open (for example: fs_LR_32k.L.flat.surf.gii)
- Use the same method to load a layer file (for example: fs_LR_32k.LR.sulcus.dscalar.nii )
3. Draw a new ROI
In the top bar:
- Within the “Mode” section, choose “Edit Borders”
- Within “Border Mode” section, choose “Draw”
- Within “Border Operation” section, choose “New”
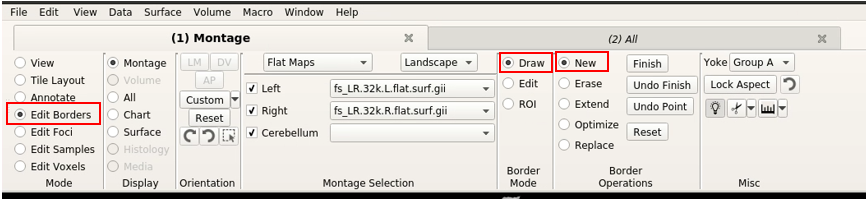
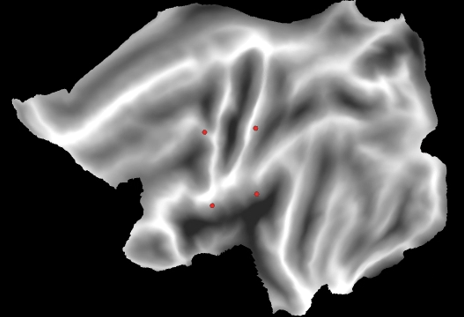
- With a pen toll, define the border of the new ROI
4. Save the border file
To save the new border file:
- In the top bar, within the “Border Operation section”, click “Finish”
- Name the new border file (for example: newROIs.border), and add a name to the specific ROI you have just created (for example: myROI.border)
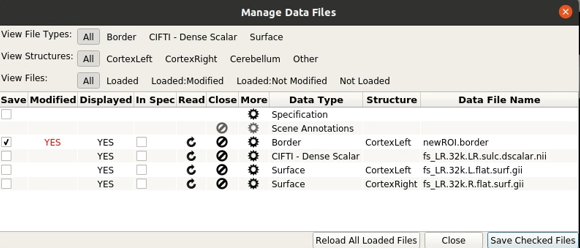
- Save the border file by clicking “File > Save/Manage Files…”, and then checking the new border file in the Manage Data Files window.
5. Convert the border file to a ROI
To make a ROI from the boarder file:
- Open a new terminal
- Use the ‘<-border-to-rois>’ command to convert the border file to a ROI.
wb_command -border-to-rois <surface> <border-file> <metric-out>
<surface> is the full path to the surface the borders are drawn on; <border-file> is the full path to the border file you want to convert; <metric-out> is the full path to the output ROI file.
Usage example:
wb_command -border-to-rois
'/cifs/diedrichsen/data/Atlas_templates/fs_LR_32/fs_LR.32k.L.flat.surf.gii'
'/cifs/diedrichsen/data/Atlas_templates /articulation.border'
'/cifs/diedrichsen/data/Atlas_templates /articulation.shape.gii'