Setup a new robotcode project
Ali Ghavampour – drafted in 2022
📧 alighavam79@gmail.com
Overview
Example: Porting a project from old XP system to Windows 10
The old codes were written in 32-bit format on MS Visual C++ 6 on Windows XP PCs. We want to port the old codes to work on MS Visual C++ 2022 Community on a 64-bit Windows 10 PC in this example.
Creating an empty project
Create a new empty project in MS VC++ 2022.
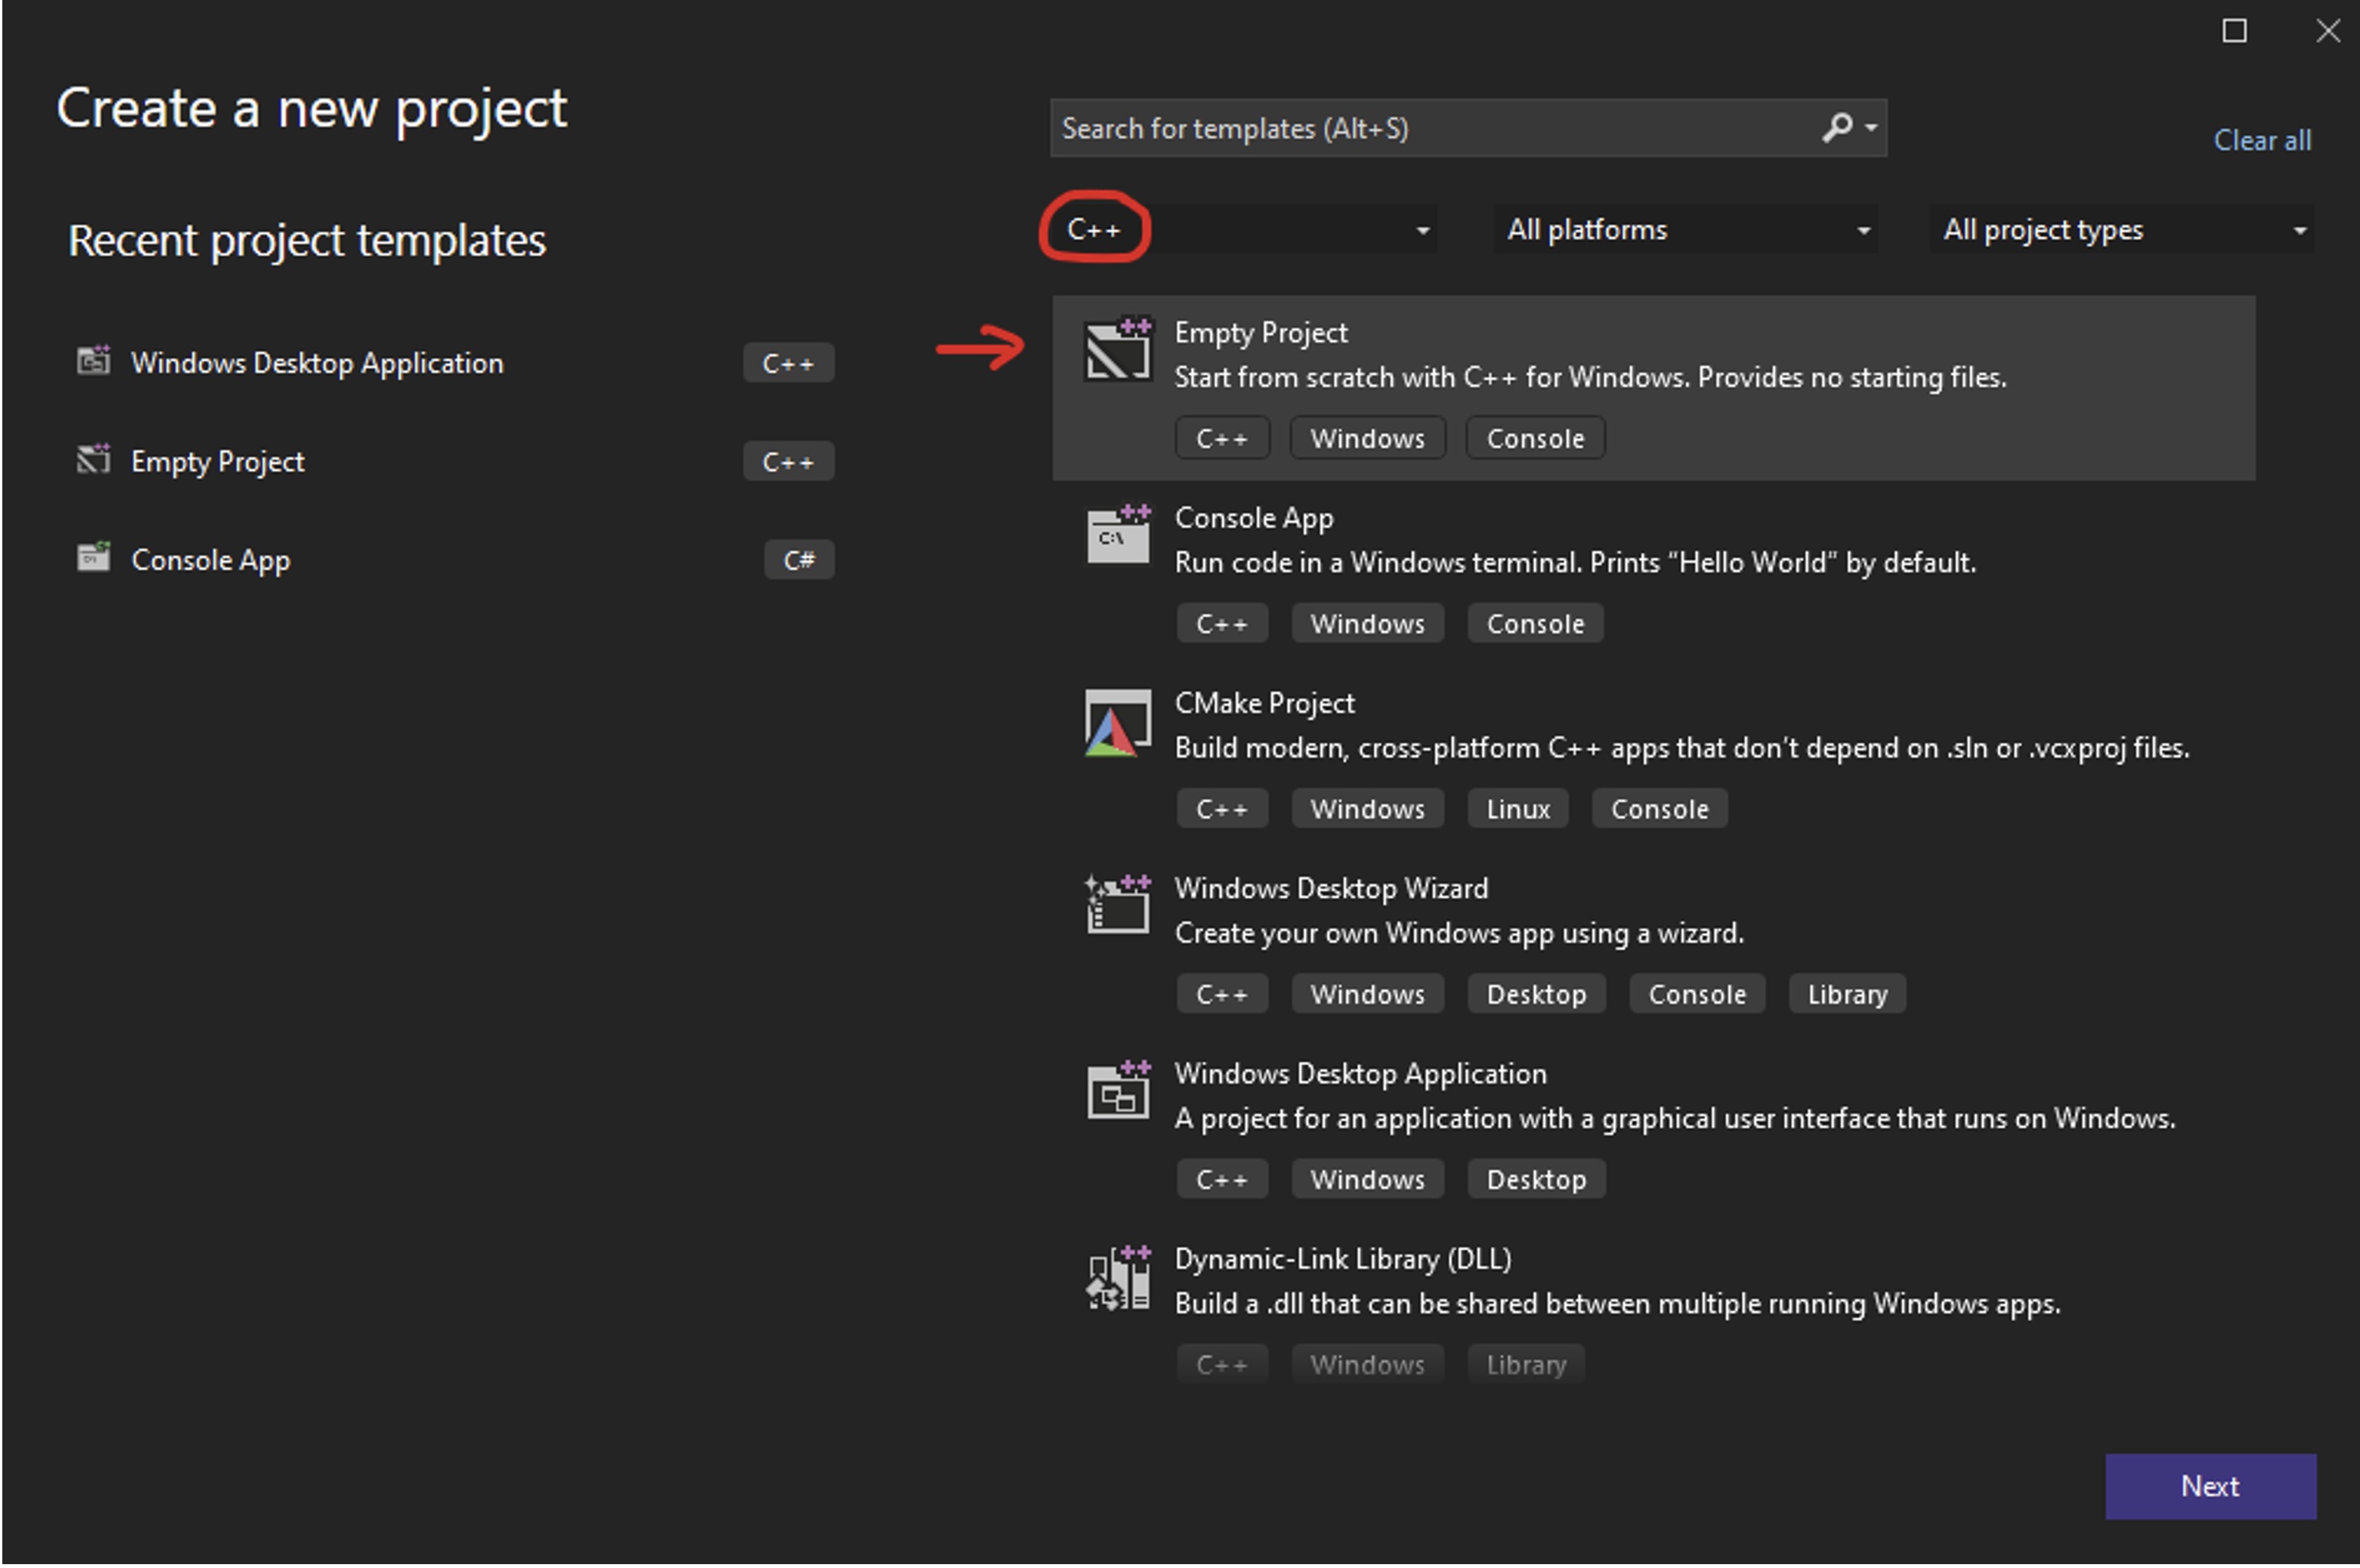
Create a new project in Visual Studio 2022
The location of the project must be: C:\robotcode\projects\
Project configurations
Then open project properties and change the following configurations:
-
Character Set Configuration
Project → Properties → Configuration Properties → Advanced → Character set
Set to"Use multi-byte character set" -
Include Directories
Project → Properties → Configuration Properties → VC++ Directories → Include Directories
Add the include (header files) to the include directories:C:\robotcode\include -
Source Directories
Project → Properties → Configuration Properties → VC++ Directories → Source Directories
Add the source to the source directories:C:\robotcode\source -
Subsystem Configuration
Project → Properties → Configuration Properties → Linker → System → SubSystem
Change to"Windows(/SUBSYSTEM:WINDOWS)"(this is a Windows application, not a console application)
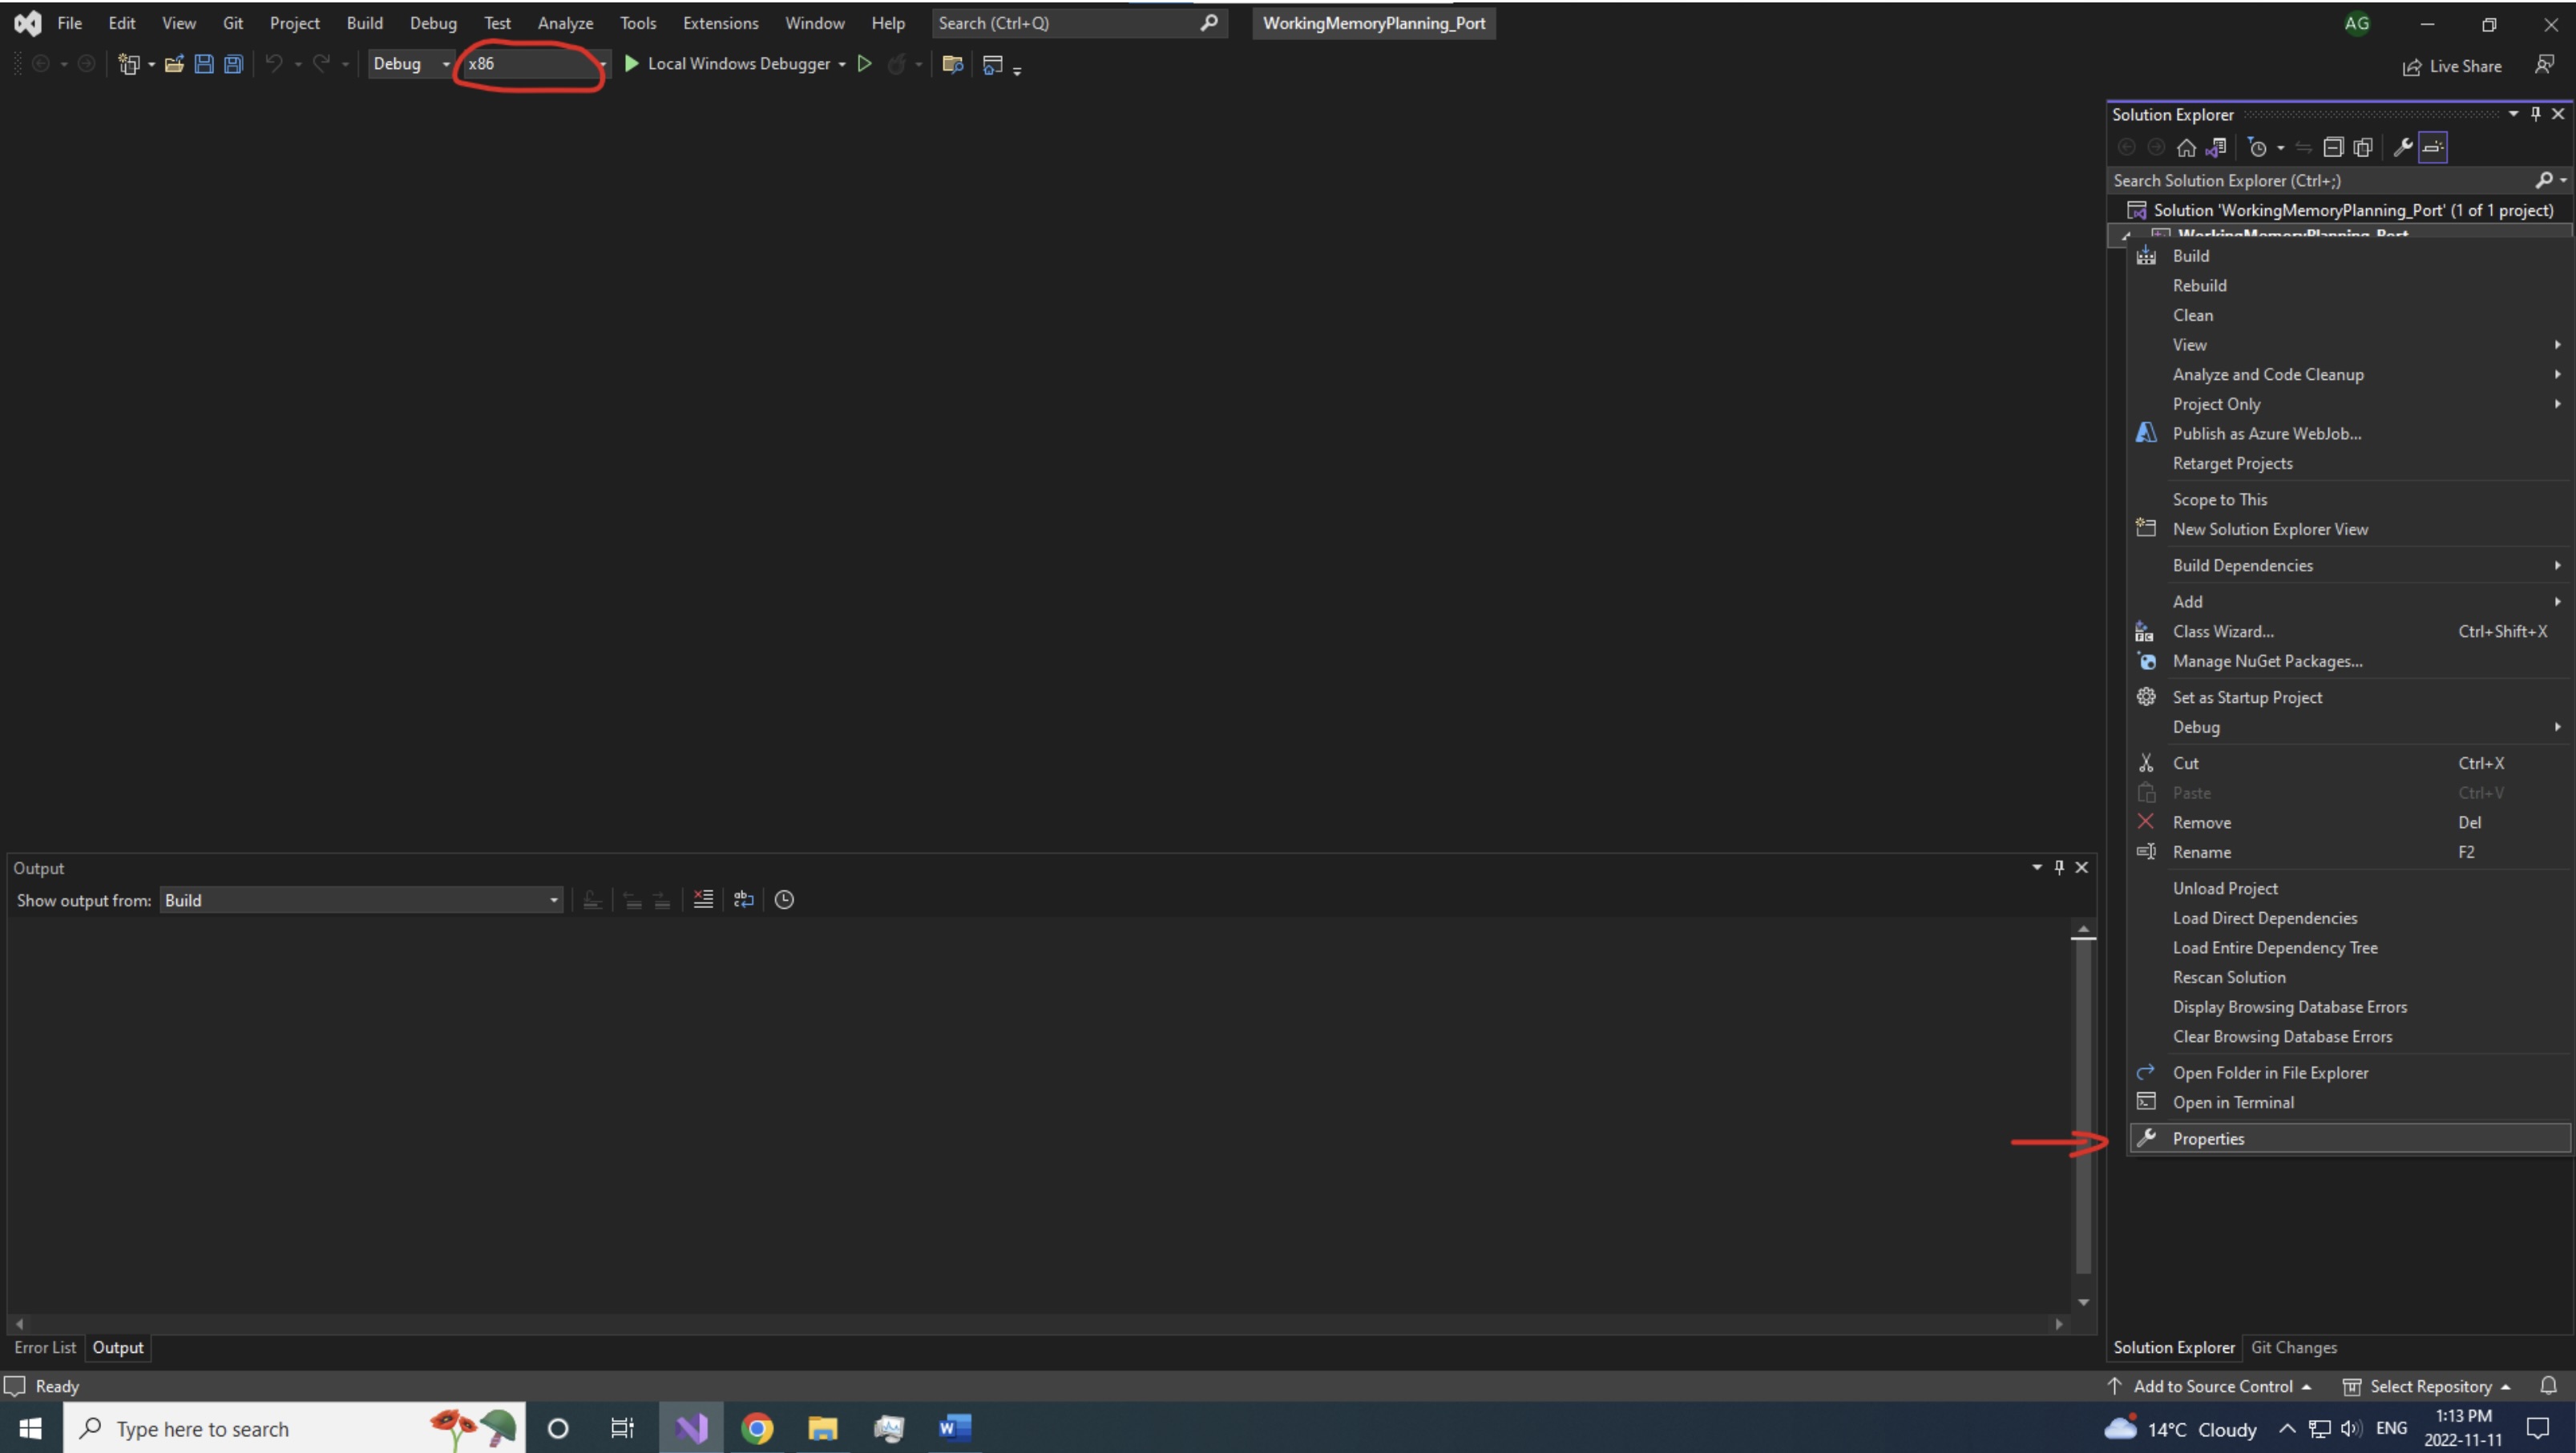
Change solution platform from x64 to x86 in the toolbar
Adding the project source and header files
Create your project’s main source (.cpp) and header (.h) files. Choose a template project you want to make your code based on. Open the main source (.cpp) and header (.h) files of the template project and copy & paste the codes to your files.
Ignoring MS VC++ warnings
The original library and codes use sprintf() and sscanf() functions. However, these functions are forced to be replaced with sprintf_s() and sscanf_s() by the MS VC++ compiler. To ignore this error:
Project → Properties → Configuration Properties → C/C++ → Preprocessor → Preprocessor definitions
Add _CRT_SECURE_NO_WARNINGS and click OK.
Add the project dependencies
By right-clicking on your project name in the “solution explorer” and selecting “Add → Existing item”, add all the project dependencies from C:\robotcode\include and C:\robotcode\source to your project.
"unresolved external symbol". Here is an example:

Example of unresolved external symbol error
Create a data folder
Create a temp data folder for your experiment in C:\data\<your project name>\
Change the paths in your main file
There are some paths in the main source codes of projects that might need change, especially if you are using a new PC. Some of the paths to check in your main code are:
If you are using sounds for your task:
string TASKSOUNDS = {
  "C:/robotcode/util/wav/ding.wav",           // 0
  "C:/robotcode/util/wav/smb_coin.wav",       // 1
  "C:/robotcode/util/wav/chimes.wav",         // 2
  "C:/robotcode/util/wav/smb_kick.wav",       // 3
  "C:/robotcode/util/wav/bump.wav",           // 4
  "C:/robotcode/util/wav/chord.wav",          // 5
  "C:/robotcode/util/wav/smb_pipe.wav",       // 6
  "C:/robotcode/util/wav/error.wav"           // 7
};
In the WinMain (your main program):
gExp = new MyExperiment("eir2", "eir2", "C:/data/ExtrinsicIntrinsicRepetition/eir2/");

// initialize s626cards
s626.init("c:/robotcode/calib/s626_single.txt");
Change the experiment setting if needed
In the WinMain (your main program):
gScreen.init(gThisInst, 1920, 0, 1920, 1080, &(::updateGraphics));
The first two numbers are the relative position of the second monitor in pixels and the second two are the resolution in pixels.
Don't forget the target files
Add the experiment target folder (including .tgt files) to the main folder of your project where your main .cpp and .h files are (e.g. C:\robotcode\projects\ExtFlxChord\ExtFlxChord).
Extra Notes
Your code should compile and build if you do all the steps carefully! If it still doesn’t work, you might be using some source and include files or a template project that were not ported by Ali Ghavampour because he didn’t need them for his projects. You might need to fix them.
Questions or issues? Reach out!